18650 Garden-Powerwall with 50KWh in Germany

Stefanseiner

Member
Joined
Apr 16, 2020
Messages
136
Hello,

my name is Stefan ( 37, from Germany) and after reading a lot at this wonderful board and watching tons of vids from HB and others at YT since the last few month I'd like to share my building progress with you folks, show my successes and my mistakes too.

The beginning:
in march this year finished my first installation of a photovoltaic at the summer house in my garden

image_zozhep.jpg


My house is an 115 years old farmers house and the roof isn't very suitable for PV, therefor in the garden

image_oqmrjg.jpg


In March and April I was pleased how much energy comes from the sun - and at the same time sad about how much energy will be "lost" during daytimes because of overproduction.

Plus: I already planed to increase the PV with some more modules on the firewood storage

image_iadctz.jpg


The point I stumbled over a video on YT where a guy tinkers on old laptop batteries to build a solar powerwall at it's own - amazing :idea:

I decided to try building a 14s40p powerwall with about 3KWh to cover the base load of the house (250W).

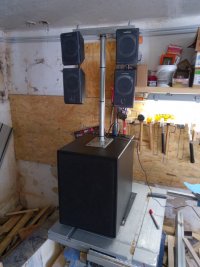
My first idea was to buy some new chinese "Supercells" with 9.900mAh or even more for the powerwall. But the "Trustfire" in my DIY bluetooth speakerbox were a flop and my China batterie 18650 test - 508.800mAh in 62 cells showed that it's the same with other "brands".
image_dfydbu.jpg


So I decided to go with used cells from major brands.

I've done some researches on the internet where to get used 18650 batteries. In Germany this is really hard because of the battery recycling laws. In fact it is not allowed to electronicshops / bikeshops and so on to give used batteries away except to a qualified recycling companies. Btw: actual in Germany, "recycling" of LiIon cells means "burning" them down :-/

So I mailed and phoned round about 100 companies all over the country to get 6 !! positive answers from some ebike shops and some accurepair services. In two weeks I drove 4.500KM to collect them, but at all it was a good deal. All together I got something about 12.000 cells stuck together in different ebike akkupacks (40 - 60 cells in each pack).

Lots of time and work to dissasseble them

image_lbdqrf.jpg


image_moiely.jpg


image_oytiwj.jpg


for testing I bought a LiitoKala Lii500 Engineer. Then another one. Then a XTar VC8 for pre-charging and 0V recovering (most defective eBike-akkus are 1-time deep-discharged because of an defective BMS, the batteries are still good and within a range of 90% or even more of the original capacity)

image_czgxdk.jpg


because I hate mussy cables next step was a charging station with an ATX power supply and some space left for even more chargers / testers

image_pebckm.jpg


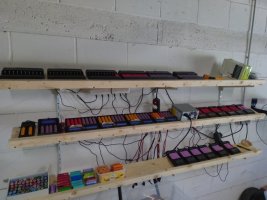
actual state for testing is: I pre-charge the cells atcheap 10-slot chargers while testing another lot of already fully charged cells in the 12 Liito Kala
image_lehvwt.jpg


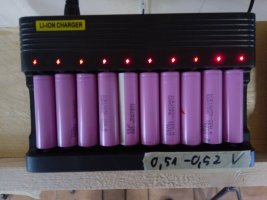
I really like the XTar VC8 8-slot charger (middle, left), but they are not really cheap and handle a maximum of 300mA per slot, so I added 10 super-cheap chinesechargers (top row)

10 independent slots each at 0,6A cost round about 10 - 11 USD incl. shipping
image_tkzmwb.jpg


Phomax 10 slot LiIon charger (the same from brand GTF)


image_vtuhiu.jpg


image_kmsckq.jpg


quality isn't the best and I had already three defective charging pcbs,
but got three new chargers send out, took the bad pcbs out, replaced them with good ones and now have too functional chargers = 20 slots extra.
Should not be your first-use charging device but for fast bulk charging it's perfect - for me.
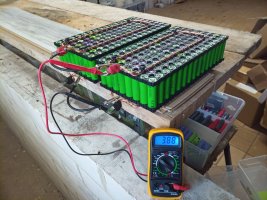
Oh, and they can do 0V reactivating as I tested, that's the first picture


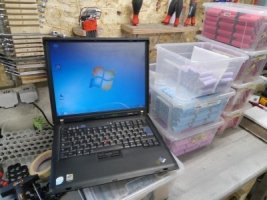
To sort the cells by capacity and distribute them on equal packs I decides to use the Excel based RePackR and therefor I prepared an old IBM Thinkpad to use it into my garage / work shed
image_lzrrsa.jpg


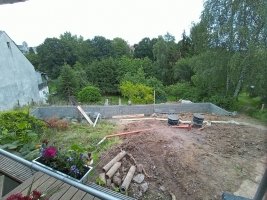
while processing the cells there were some works outside going on to build a terrace
image_klwjep.jpg


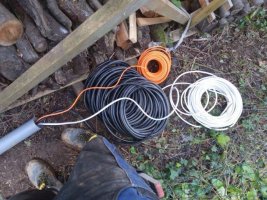
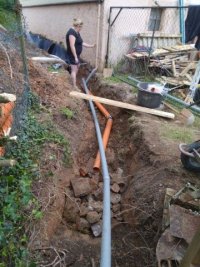
within this works I did some cable works...
image_dhemad.jpg


...from the house...

image_rocizb.jpg


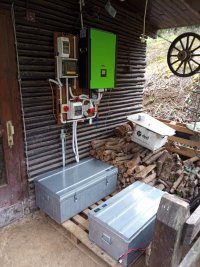
...to the firewood place - which got 8 JA-Solar modules each 340Wp. This will be the system for the DIY powerwall

image_ibiokc.jpg


electric housing with lightning-surgeprotection and an extra 400V connection for heavy equipment such as log splitter

image_qsjwbn.jpg


the inverter will me mounted into the cellar of the house in a grid parallel mode. Just had to add an extra 5x 2,5mm wire

image_foxxih.jpg


image_dtbult.jpg


the place for the inverter. It will be an MPP solar / Infinisolar hybrid. Model unclear at this moment

image_qwxtii.jpg


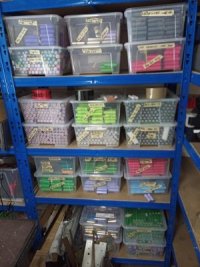
still processing cells. At this time I sorted them by model into boxes to safe time when adding into the Excel based RepackR
image_gyiafr.jpg


but as my progress goes on, my plans with the total capacity grown too. Actual plan: build one test-powerwall to learn how to build them best, then build another one and get about 10KWh total.
At this time a decided to not use the Excel because of the huge among of time to fill all the data in. Instead I wanted to sort the cells into steps of 50mAh like HB have done with his huge powerwall (I think he used 100mAh steps)

image_mnoupo.jpg


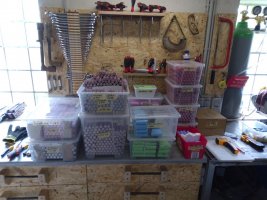
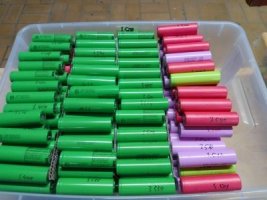
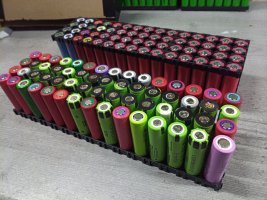
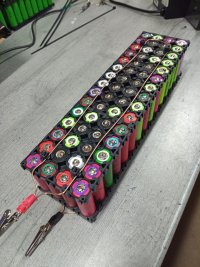
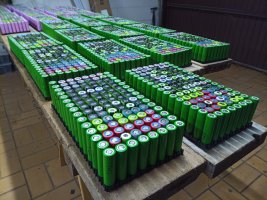
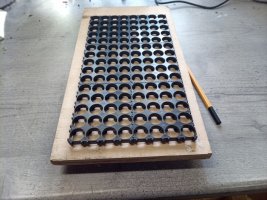
So I bought 30 or 40 new plastic boxes. This are "Samla" from IKEA. I hate! this shop because I can't find out when I am in... Butr this boxes are perfect for 18650s. ~150pcs fit in the smalles 4L box (as on my first pictures above), ~350pcs in the bigger 11L box

image_fsuict.jpg


image_qkojel.jpg


costs me several days to sort the already processed cells into the 50mAh-boxes. I better had done this directly when took the cells out of the charger

image_ejgcwc.jpg


short-circuit mistake. Just one of innumerable others... :s

image_cavgej.jpg


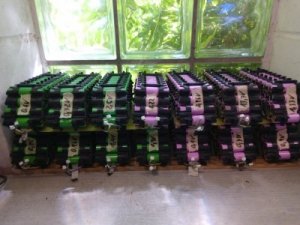
after 30 or more different types of eBike akkupacks the best are definetely the ones from Bosch.
40 cells, very quick and easy to dissasseble, just high-capacity cells (LG MG1 with 2.850mAh minimum, mostly LG and Samsung with 3.500mAh), no glue and other shit between the cells, and every single akkupack of 130 I got in total was a defect at the BMS with cells in very good condition. No heaters, no dead cells, no water, no mechanical damage. Perfect for my use.
image_yvpefv.jpg


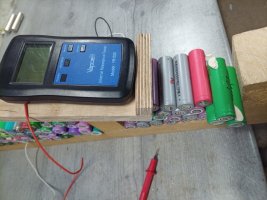
after the capacity-tests I checked the inner resistance with the well known Vapcell YR1030. But it's annoying to chek them laying on the table, rolling around so I builded a little helper-thing

image_nvfsqa.jpg


now I can handle 150 cells

image_qrjtcy.jpg


image_pylnuv.jpg


Timelaps video


I test them one by one and the bad ones (70mOhm or more) are pushed out a little bit, so when finished all cells I can sort them out for trash or other purposes

image_jzwftg.jpg


of course I had some cells which need a new heatshrink

image_miwmjr.jpg


purple is not my favorite colour, but I killed the complete stack of green shrinks within one unfocused moment while pan the heatgun :dodgy:

image_ksojxo.jpg


finally!! it's time to start the test-build

image_hoefmr.jpg


I am using the not-so-good laptop cells with round about 2.300mAh.
Laptop cells? In German internet forum you mostly can read about builds with laptop cells and how easy this is to disasseble, while eBike-akkupacks aren't easy to open and process, so I've given them a try and collected some laptop batteries from recycling companies.

image_bnxotu.jpg


image_jodnwf.jpg


image_rflwzk.jpg


image_gbkpni.jpg


image_ldsipp.jpg


to be continued
 
I like the resistance testing rig :)
So far I have had 1 major short, quickly rush it outside to let it finish burning.
Many cuts. At least the nickel strips are sharp and heal fast.
 
because the powerwall will be inside the house I will use a fire safe cabinet. And as I tested if the 40p packs will fit - they seemd to be too small :p

image_yyhmoq.jpg


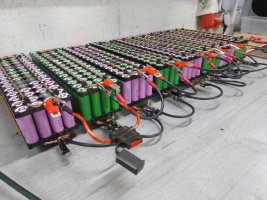
so I added another 4x5 cellholder and 20 more cells

image_iilpkv.jpg


14s60p. Now they don't look like some toy batteries anymore :sleepy:

image_xchtpc.jpg


for security I want to use fuse wire and therefor I will soldering the cells

image_jvxueu.jpg


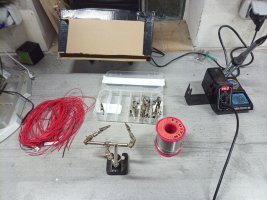
but my old Ersa soldering iron with 40W is too weak, and the new 200W chinese iron seems to be bad quality, after 120 soldering points this is how it looks like. OK, can be grinded.

image_tokdpu.jpg


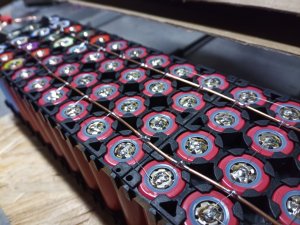
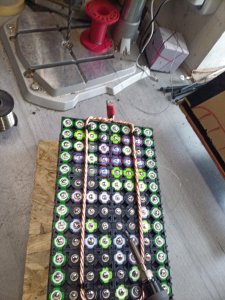
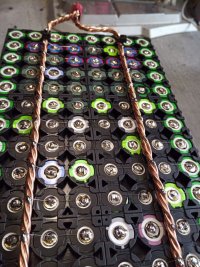
my first pack is done. Busbars made of 3x 2,5mm copper wire

image_cceuth.jpg


SC16-6 ring-terminals at the end for solid connection between the packs.

image_jtzero.jpg


mini-voltemers includes

image_jpxigy.jpg


while soldering another pack the fuse wire of one cell burned two or three times untill I noticed, that this cell is getting hot and hotter.
What happened? A soldering wire marble roled into the gap between the positive pole and the negative shell. So quickly disconnected the cell and throw it into the "Fire bucket". I have two buckets in my shed for this, one with the boddom covered with sand where I can throw hot cells and cellpacks in, and another bucket full with sand to pour into the first.

image_tdingp.jpg


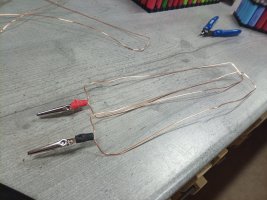
Balancing. I did some cabels with alligator clips to balance all of the 14 packs in parallel. In the meantime I can modify the metal cabinet

image_bdzhsl.jpg


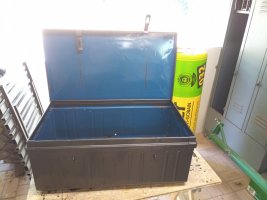
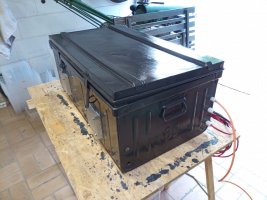
It's an old metal box too. I sanded and painted it new

image_hnhzth.jpg


then some works for thermal care.

image_gltdej.jpg


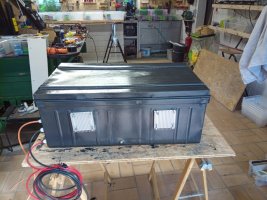
I dont want the box to be 100% airtight, but I want to keep the fire into the box if there will be one, so I don't want to use an open ventilation system.

image_jormmw.jpg


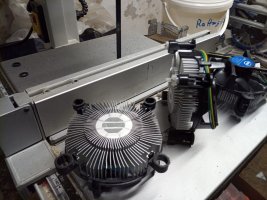
Using some computer cpu cooler (Intel boxed cooler) at the inside...

image_xankjd.jpg


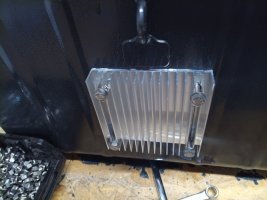
...and some 100 x 100 x 18mm passive radiators...

image_bdsnra.jpg


...with thermal paste...

image_cxtfvr.jpg


...at the outside

image_pklgtu.jpg


will be tight fitting for the 14s60p system

image_ppwunz.jpg


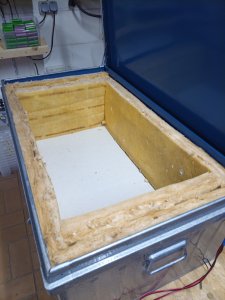
fermacell at the boddom and 40mm mineral wool WLG032 (fireproof 1.000C +) at the walls

image_vkspgz.jpg


getting even tighter but fits

image_ryqjzo.jpg


7 packs in parallel...

image_aoxcgm.jpg


...intermediate floor with fermacell...

image_ntsygb.jpg


...and 7 more packs

image_vmspuo.jpg


all packs are separated with fermacell separators with 12cm in high = 2cm more then the packs to ensure ventilation.
In front some space left for cables and connectors

image_ascccz.jpg


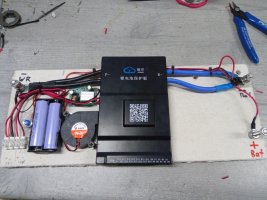
BMS / active balancer, 100A DC circuit breaker, voltmeter and fan controller (not on this picture, now it's mounted at the left of the bms)
It is an JKB2A24-15P which means it is the version with 2A balancing current, 150A continous charging/discharging current, 300A max.
I like this BMS / active balancer module and you will find more infos at this thread -> adjustable Cheap Chinese Active Balancers

image_upcewv.jpg


another 40mm of mineral wool on top

image_ljbjlb.jpg


image_khoyje.jpg


image_xmhxhy.jpg


image_lnlhdv.jpg


image_odqmin.jpg


now I am running some tests to evaluate the thermal developement.
The inverter I finally bought is an Infinisolar E5.5k It's the same like the MPP Solar MPI 5.5k

image_hexzmy.jpg


But as far as I can say at this time, the temps inside the box are OK and stay below 30C at a maximum discharge current of 30 amps = 0,5A per cell. If tests are going well I will raise the limitation to 60A = 1A per cell.

image_vxwasa.jpg
 
Very nice work; good thing you have a large supply of cells to work with.
 
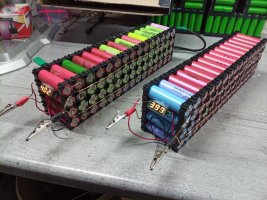
this first test-powerwall is about 4,3KWh and works grid-parallel

image_mstgeg.jpg


image_ecbure.jpg


this is the day I "activated" the powerwall for the first time (Green is consumption from the grid, orange is PV-production which is going into the grid). You see the green line at the morning which is the permanent consumption of our house, round about 250 watts.
Over daytime the PV produces more electricity as we need and feeds into the grid. The green peeks between are coffee machine and microwave. After 6pm when the sun goes down there is, now with powerwall, no permanent consumption :) at 8pm the big peek is the oven / stove while cooking

image_ehxpbi.jpg


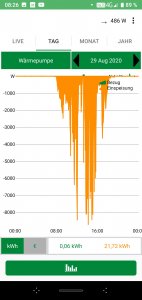
an exemplary summer day with PV and powerwall :)
0,06KWh consumption from the grid and 21,72KWh feeded back into the grid

image_xudhov.jpg


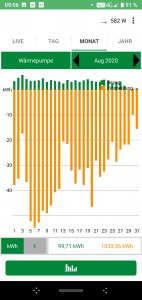
summary of August, you easily can identify the first day with powerwall

image_xgfirt.jpg


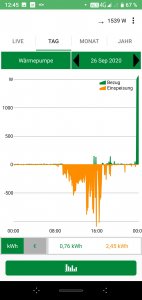
26th of September: the heatpump working for the first time in this year and the consumption raises

image_vqgmyw.jpg


this is a typical day now

image_eereuz.jpg


the bad days are coming :(

image_xylzvy.jpg


here is detail view of Oktober 1st. You see that the powerwall is zeroing the consumption till 7am, then it's empty and you see the thirsty heatpump working

image_ewiror.jpg


the first 4,3KWh are finished and working well so I can do some other work

image_nwrhop.jpg


image_zrjwrt.jpg
 
The planned 3KWh are 4,3KWh now andcompleted, next step is a second powerwall

image_yrojko.jpg


this will be a 14s60p system too, but with some improvements because of the knowledge I have from building the first ones

image_tvjfit.jpg


image_knaatp.jpg


the first pw was build of the "bad" cells I had, now this one will be build out of the "nonplusultra" cells

image_cirbgb.jpg


a minimum of 3.450mAh

image_cnrisv.jpg


image_pjrwad.jpg


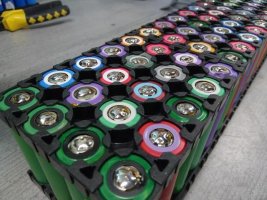
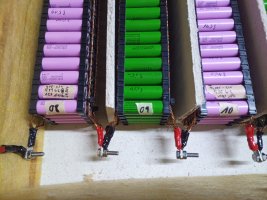
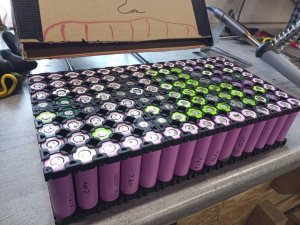
most of the cells are LG MJ1 (green) and Samsung INR18650-35A (pink)

image_zwkdaz.jpg


trying to sort by color - and of course by capacity. Equal spreading in steps of 50mAh

image_jrnrol.jpg


btw: this is my favourite step witin the whole building process: taking long-tested cells with both hands out of full boxes and stick them into the holders :sleepy:

image_hsynyi.jpg


image_lcisxq.jpg


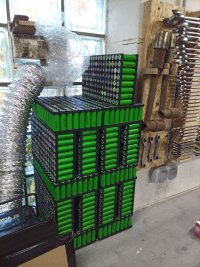
the tower of power

image_qmwdgx.jpg


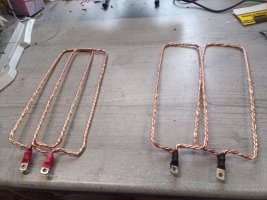
the next steps are as from the last one: making busbars outof 2,5mm wire

image_qdihzx.jpg


image_ydqlcb.jpg


twist 3 of them

image_kytkja.jpg


image_izuill.jpg


in total one busbar has 15mm

image_siyrlp.jpg


for a better contact and to be sure, the ringterminals won't move I'm ironing before crimping

image_bxafzp.jpg


when the flux is still warm you can easily crimp and the flux will a little bit self-adjust

image_taoiis.jpg


image_peqvfu.jpg


balancing

image_gpmgtv.jpg


before adding a new pack to the balancing-row I use a cable with a 10A fuse to avoid that the little fusewired will be blown

image_uhgifo.jpg


because the cheap chinese 200w soldering iron is annoying me I got a new one, an Ersa 150S with 150W. Costs round about 75USD

image_sqtojy.jpg


the soldering tip is lots thinner and - it's a permanent one

image_clmgyo.jpg


If I knew earlier how much time and nerves this will save... :rolleyes: and solder wire too!

image_fyjidw.jpg


this time without extra voltmeters. Inside the firesafe cabinet I can't see the displays anyway

image_ofkspd.jpg


ready to build them togehter

image_imairb.jpg


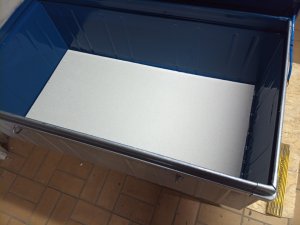
I bought another metal box, identically to the first (just a little bit wmore width), sanded and painted it with some anti-rust paint

image_hdcipk.jpg


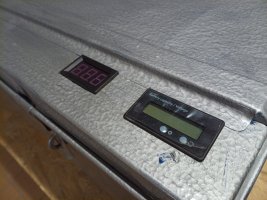
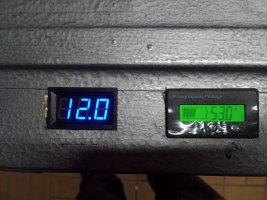
improvement: I want to integrate a voltmeter with battery-capacity-display and a temperature-display into the case top for a quick look while walking by so I will not have to start the app, connect, check every time just to see the main-condition

image_kwziwu.jpg


I'm loving the little cutting discs I have left from my PC-modding era, these are from an dental lab and a lot better then the standard cutting discs you will find for this multi tools

image_idhfdj.jpg


sits and fits

image_trxxdl.jpg


image_ewplba.jpg


image_agnypb.jpg


then the fire safe stuff

image_uipues.jpg


image_xyaewk.jpg


image_tpmozh.jpg


image_zgsdbp.jpg


forgit the holes for the cables

image_ncscxk.jpg


image_unwgbn.jpg


image_zjgtpw.jpg


as from the first one I am using 10mm Fermacell plates for the bottom, as separatores between the packs and for the intermediate floor

image_ztyyir.jpg


some SC16-6 ring terminals ans massice screws for connection

image_dayzrh.jpg


before adding the second row I have to connect the BMS because later I will not have enough space to reach the bottom row

image_frzdlr.jpg


for easy and fast changings / mantainance I will not solder / screw the BMS cables, I am using alligator clips

image_bivynf.jpg


image_kpkgkx.jpg


the bottom row has 2cm space under this intermediate floor for air circulation

image_hedfop.jpg


image_vrihut.jpg


image_pqxrqh.jpg


mainly the same BMS as at the first 4,3KWh powerwall. The other is a JK-BD6A24S-10P (0,6A balancing current) which I changed later on to the 2A version. And it's the older, edged version without the big barcode on the top.
Now I am using directly the 2A version (JK-B2A24S-15P)

image_cfjlrm.jpg


it will be mounted on a piece of fermacell plate

image_hffkwp.jpg


because there will be some mineral wool directly on the top of the BMS I glued some nuts as spacers below the BMS for better airflow and cooling

image_jsgwov.jpg


adding a radial cooler at the side (where a few air holes are situated) and choose the high of the cooler so that the airflow will go half to the holes and half below the BMS to cool the case

image_pgareb.jpg


adding two 18650s and a dip-switch to start the BMS. This is a bad thing of this BMS that you have to put a short impulse of 5V between the main B- and P- connectors, and not having a simple switch or so to start this thing up

image_zdvsnm.jpg


I need 12V for the temperature sensor display in the case top, and for the aircooler. In the first build I took the voltage directly from the akkupacks (main negative and three packs away the positive) and this caused in a permanent balancing of this tree packs.
Now I am using a little buck converter

image_wrcsjr.jpg


image_snwszt.jpg


adding the main wires

image_bqnlgs.jpg


image_qfiagc.jpg


finished

image_hlgnaq.jpg


image_ookcpk.jpg


image_pmpjzm.jpg


because with a max. current fo 1A per cell the whole powerwall isn't getting warm inside the box although it is isolated, with this build I didn't add some extra coolers to the box as I did with the first one
Hottest temperature I got (with the coolers not spinning) was below 30C with an temperature at the outside of 22C

image_tdjmxg.jpg


I added some amored tape around the top wool so I can better lift it up for checking without the need of wearing gloves (or wearing not and getting prickled by little glas needles)

image_senead.jpg


image_juqntl.jpg


ready for the sun :cool:

image_ezrosg.jpg


edit:
I forgot to mention, this time I was able to check the real capacity of the packs with an electronic load

image_tpgvnj.jpg


though I tested every single ceel with the LiitoKala but the test is from 4,2V to 2,8V andwith this results I have to estimate the usable capacity.
Now I can test the real capacity between 4,0V and 3,3V - which is the range I will use for the powerwall

image_kdjpih.jpg


It's a total of 6,8KWh
 
now that the Infinisolar E5.5k is up with ~11KWh I can turn to the second photovoltaic on the garden shed and change the Fronius Symo inverter (no battery support) to an MPP Solar MPI 10k.

image_jockdn.jpg


another change has been done into the main circuit breaker box. To get two inverters running in netparallel mode at the same time I have to use two SDM630MCT and set the inductive sensors to a false value so the two inverters only see a part of the actual consumption. The smaller 5.5k inverter will get 40% and the 10K the other 60%

image_ggxciv.jpg


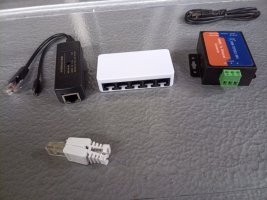
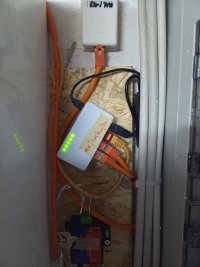
because I don't want new modbus cables through the house and through the complete garden to the MPI 10k, I tried some modbus-to-ethernet adapters to chare the signal over the existing CAT7 installation. Costs me a bunch of nerves until this works...

image_rwapxr.jpg


for testing this is the actual setup. The 6,8KWh powerwall and an addition 3,3KWh I build for my mother's house I've done as a side-project in the last week (14s40p).

image_gyhemm.jpg


in the meantime a startet another side-project

image_kkmggy.jpg


because I want to test if my fireproof cabinet is rock-solid firesafe I plan to build another cabinet and provoke a fire

image_smayjy.jpg


therefore I am using 840 heater cells to imitate my real 14s60p system

image_wwdaqp.jpg


most of them I will only place into cellholders but without connecting them electrically, but to provoke overload and overtemperature I build two 60p packs

image_ykeqqw.jpg


image_dlavjf.jpg


the packs won't have to handle high current so I will use just 1x 1,5mm for busbars

image_dwpfrk.jpg


and alligator clips so I can connect them easily

image_xomssx.jpg


looks strange...

image_peskmb.jpg


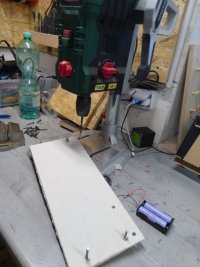
the next steps are easy. Drill holes, some zip ties,

image_fcjklp.jpg


image_gpeakg.jpg


and fusewire

image_etlngw.jpg


why fuses? Because for me it's the easiest way to solder cells and busbars. And: this are lots of part-defective heater cells, I just want some fuses on it...

image_wkvwvx.jpg


because I plan to do this experiment in spring when temperatures are higher, I am sure the pack will self-discharge. I add some voltmeters so I can see when I need to recharge them a little bit

image_qcwslc.jpg


image_earawo.jpg


others try to avoid singel heater cells - I build whole packs with them. Why not?

image_udgkhp.jpg


balancing till spring. In the meantime I am collecting some more heater cells. At "my" German DIY powerwall forum I started a "Search heater cells" thread and people help me get 840 bad cells for this.

image_ktncqn.jpg
 
Now, with the two 14s60p powerwalls I already finished with a total of 11KWh I am hooked - and want some more power :angel:
Fortunately I have some more already-tested cells left

image_evgaqa.jpg


But no more tiny steps, I want to do it the right way. I will switch to 120p packs and...

image_zkblex.jpg


...do two systems with 14s each. Plus 1 pack for spare = 29x 120p packs to builld

image_mbqcpf.jpg


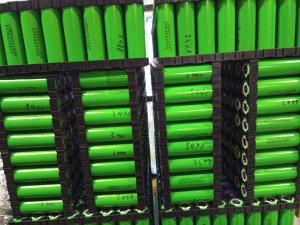
trying to sort a little bit by color. The green ones are LG MJ1...

image_xipwfp.jpg


image_abeiyz.jpg


the pink Samsung 35E

image_ydmoba.jpg


image_jtgwtn.jpg


needs a lot of space to build this up

image_tnshys.jpg


here is a timelaps of the building process. In realtime this is about 5 hours


image_bprkeq.jpg


image_nnjrqw.jpg


image_suwule.jpg


image_gxzkum.jpg


image_eiqxnm.jpg


tower of power no. 1

image_rembvx.jpg


image_nclvsj.jpg


cell capacity reaches from 2.750mAh to 3.500mAh, average is about 3.000mAh

image_ylxyhq.jpg


tower of power no. 2

image_ntdfex.jpg


same values as the green

image_nvkjri.jpg


I am still using fuse-wire and soldering iron. Trying to calculate how many soldering points I have to do...
- pre-soldering both sides of each cell = 2
- fuse-wire on each side = 2
- fusewire to the busbar = 2 per 4 cells = 0,5 per cell
total of 4,5 soldering points per cell

29 x 120p packs = 3.480 cells
3.480 x 4,5 = 15.660 soldering points

OK... before that I worried about what to do with my freetime while corona lockdown - now I have an idea :s

image_rbpcew.jpg


image_wqaetq.jpg


image_ybncxu.jpg


pre-soldering is very easy and quick with the Ersa 150s


image_eijwyc.jpg


image_yzsaoo.jpg


now I have "professional" cable dispenser :blush:

image_jqbqad.jpg


for the new pack layout my bending template will not work. It fits for 60p and 40p

image_obbkav.jpg


but there is some free space on the back side

image_guuqvm.jpg


image_wnmcvc.jpg


image_xmniys.jpg


image_vvzqfx.jpg


what it will looks like

image_pfxumu.jpg


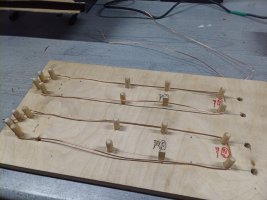
this time I will use 4mm wire

image_vetgne.jpg


85cm of cable

image_dotevm.jpg


image_xfypux.jpg


image_kmpyjf.jpg


I twist 4 pieces = 16mm or because busbar is twice that's 32mm in total

image_nzzwos.jpg


image_yulzgl.jpg


image_kaommh.jpg


image_mqsdkt.jpg


a little hard to bend but it works well

image_nfxosc.jpg


unfortunately the 35mm rinterminals I bought didn't fit the two 16mm busbar endings. So I decide to take two 16mm ring terminals

image_hgvjrr.jpg


soldering the busbars did not work well with these 4mm cables

image_beulwj.jpg


so just crimping

image_jbodoe.jpg


one heatshrink for both endings

image_lovjmk.jpg


image_qsdahi.jpg


image_eutkux.jpg


image_icejdi.jpg


image_ocmdfl.jpg


image_zfqrmp.jpg


timelaps of the fuse-wire soldering


image_rcavwx.jpg


image_qklmtb.jpg


I think these big packs will need some time until they are fully balanced

image_ptlrqk.jpg


I give them 4,05V from the DPS8005

image_ytzova.jpg


yaih, the sun comes out so I pause for some non-battery-work

image_myfrzh.jpg


btw. my first project with akkus and the reason why I started with this whole thing - DIY speaker with bt. Loud enough for some wood works

image_yyozaj.jpg


image_voqijg.jpg


image_esotga.jpg


image_ompnkr.jpg


very rebellious fir wood. It's everywhere in the garden. A lot too much and I have to cut some down time by time

image_yssvua.jpg


after two weeks of ticker and try and error and grumbling I finally got the two inverters working together - via modbus-to-ethernet adapter and with the two SDM630MCT energy meter

image_ijmjyb.jpg


now I am soldering the packs one by one, hook them together for balancing...

image_mkflme.jpg


...test the real capacity from 4,05V down to 3,3V with the electronic load...

image_qgxtcq.jpg


they all have about 950Wh. This is a total of 13,3KWh per system, together 26,6KWh. Added to the already existing 11,1KWh this will be a total of 37,7KWh :)

image_hqtkzc.jpg


this one was falsely-charged up to 4,10V

image_xcmqep.jpg


after discharge-test I charge them again to 4,05V with the DPS5020

image_ncxsxq.jpg


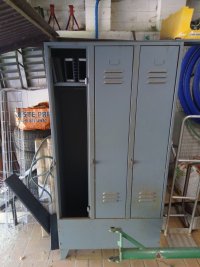
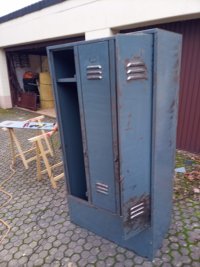
that's the actual status. The packs are just all done and now I have to work at the old locker I will use as a cabinet.

image_qizelk.jpg


ToDo:
  • weld some more shelfs into the locker
  • drill some holes for cable outlets
  • sanding and painting it
  • install some firesafe isolation
  • prepare the inverter-places for the bigger powerwalls (thicker wire, new DC breaker)
  • getting the locker down the muddy way to the garden shed without dying...
  • installing the packs
 
Sehr cool.
Ich bin gerade dabei ein hnliches System zu bauen. 2 x 14S240P
Woher kommst du denn? :-D Ich wohne in der nhe von Cloppenburg
 
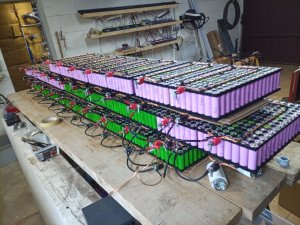
all the 29 packs are build and connected in parallel for balancing

image_vxtuoj.jpg


this week I sanded the old locker a little

image_vliavz.jpg


image_wcorsg.jpg


but before painting I have to weld some more shelfs into it and they aren't delievered yet, maybe next week

image_mrelyu.jpg


in the meantime while waiting for the shelfs I processed some laptop batteries

image_gmopma.jpg


I already plan to upgrade the powerwall when the both 14s120p systems are completed

image_ynsemb.jpg


lots of trash

image_cjsalo.jpg


cleaned and ready for capacity test

image_oxvusk.jpg


at the testing station I can do 64 cells per round, 2 to 3 rounds a day. Because the XTar VC8 only can charge and discharge with 300mA and therefor slower then the LiitoKala I can test round about 150 cells in total per day

image_ulmhnj.jpg


After 600 laptop batteries / 3.600 cells the interim balance looks like:
20% are trash. Leaking, rusty, dead or below 1.000mAh.
60% are between 1.000mAh and 2.000mAh and will go to eBay
15% are between 2.000mAh and 2.300mAh
5% are between 2.300mAh and a maximum of 2.500mAh, nothing higher (indeed a handful is higher, but not really mentionable)

image_ngmmlf.jpg


For my last powerwall 2.300mAh was the minimum I accepted, but this time I think I have to go down to 2.000mAh to get a usable amount of cells to work with. We will see, maybe I can get a few more ebike batteries
 
>all the 29 packs are build and connected in parallel for balancing
Very cool / pic! You'll need to borrow the forklift from the 'leaf' guy that posted recently(So it begins thread):)
Why 29 instead of 28? Is one of them an 'extra'?
 
checking the IR

image_xwyrvb.jpg


cells above 70 mOhm were pushed a little bit out so after checking all the 150 cells I can sort out the bad ones

image_llspnv.jpg


Stefanseiner said:
After 600 laptop batteries / 3.600 cells the interim balance looks like:
20% are trash. Leaking, rusty, dead or below 1.000mAh.
60% are between 1.000mAh and 2.000mAh and will go to eBay
15% are between 2.000mAh and 2.300mAh
5% are between 2.300mAh and a maximum of 2.500mAh, nothing higher (indeed a handful is higher, but not really mentionable)
[...]
maybe I can get a few more ebike batteries
and after IR test the "statistic" is going even more bad.


So last week I phoned a few of my suppliers and luckily one of them had a early christmas present for me :)

image_alhxng.jpg

all are Bosch Powertubes, 99% of them will have a dead BMS and good cells I guess.
So first I will finish the last laptop batteries (round about 150 to go) and then I will disassemble the powertubes
 
Nice project dude.
Very impressive!
I am from Saarland as well and I am building my packs with Sanyo GA cells. Around 1200 until now.
It is a 13S15P because 3 original packs were build this way so I decided to add 2 more in the same setup.
Still a lot to do including PV panels, Inverter and climatic battery shed for the garden.
As you're using the MPP Solar Inverter can you tell me if I can set the Output to the grid via MQTT or similar protocols?
I have an IR head (with PI Zero) for reading the current load from the EHZ meter (Hager) and set the inverter to this value so it will not feed power into the grid but stay in the house.

Thanks in advance and stay healthy
Alex (Warndt)
 
Back
Top