Dala's EVNX buildthread (1991 Nissan NX)

zag2me said:
So what type of motor are you considering for this project?

DC, 20-30kW range. Still kinda on the fence.

The additional Opus'es showed up, first thing to do is to add 120mm fans to them

image_atqijn.jpg


And here they are put into 24/7 operation. Now I can dig into the backlog of cells with triple the speed!

image_pnqmnk.jpg


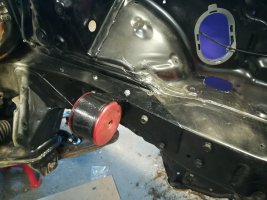
Back to chassiprep. I modified the front support beam, by chopping off the radiator mounts to save weight. After that I covered it all up with Rostex. All that is rusty in this picture is the horns, I am unsure if I'm gonna install some newer ones or refurb the old ones.

image_gzknbo.jpg


Let's tackle the ABS system. When I did the tierod ends, I noticed that the sensors crumbled into dust when you touched them. I highly doubt that this system was operational to begin with. Here's the pump, with the two outlets disconnected from the distribution block. This is a clever system, the brake cylinder has two outputs, each going to a front/rear combo, to maximize safety if one fails.

image_hsulqo.jpg


Here I removed the pump, rerouted the pump inlets into the distribution block, bypassing everything. Now the pipes just need to be bent into a cleaner looking shape. The pump weighed 3kg! so it was def worthwile to remove it.
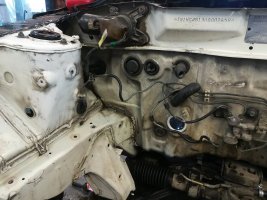
image_ftwyjy.jpg


And here's the area after prepping and painting.
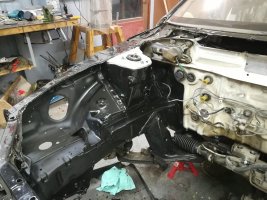
image_lkrbtb.jpg


To be able to remove everything else related to ABS, we first need to remove the dash. Here we have full access to all remaining electrical connections. The ABS ECU sits in the lower right corner.

image_pipfvc.jpg


ABS ECU. This was a heavy one too! Feels very satisfying to remove weight, it's really addictive :)

image_qbcape.jpg


Remember the rusty fenders? I treated one of them, ground everything down to bare metal, zinced, rostex, ready for installation.
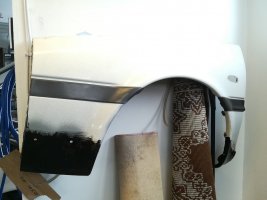
image_oxwjim.jpg
 
Update!

With the three testing stations running at full steam, I can now process a bit bigger amount of cells per week. It seems way more attainable now.

image_yogump.jpg


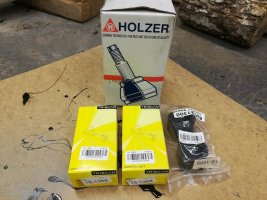
But back to the garage. I picked up a few more suspension bits, two front sway-bar end links, two bushings for it and a discounted -70% CV joint! This will help when it's time to puzzle together a beefier axle setup.

image_txakzu.jpg


I started with dismantling the suspension. The knuckle/hub needs to be refreshed. Also look at the amount of corrosion where the brake line connects! Yikes. Brake fluid sure likes to eat paint...

image_mpcbvx.jpg


Here's the rusty knuckles in closeup. Sandblast time? Don't worry about the shocks, they are not going back on :)

image_dlzglo.jpg


With everything removed, I angle grind-ed down the wheel arch to bare metal. This took quite some time. After that I applied hammerite to seal it. At this time I noticed that the caliper glide bolts were totally rusted shut. I will need to source some new ones, maybe even new calipers.

image_lalhku.jpg


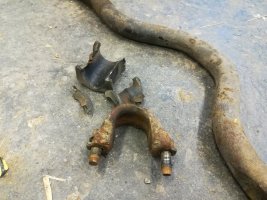
Now I could start with what I really wanted to replace. The sway-bar hardware. Looks like I caught them just before they turned into dust!

image_ujiaeu.jpg


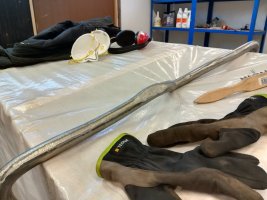
The bar looked quite crusty, so I gave it a whirl with the angle grinder. Grinding round objects is not easy :/

image_qxsqis.jpg


The bolts and bracket received the same treatment, now some zinc after cleaning them up.

image_luhnvd.jpg


Finally more metal hammerite to seal the deal.

image_lzokfa.jpg


Final assembly of it will have to wait ~10 days, I'll be off to Amsterdam :)
 
I am back from vacation :)

Ran out of cells to test, started breaking down more laptop packs. I only have 21 packs left now, will have to go scouting for more in uncharted parts of the city.

I have also encountered a few cells with surface rust on the positive side. I instantly discard these, wouldn't want it to spread or cause more issues down the road. Rusty cells often look something like this (not my picture)

image_yyhupm.jpg


I have also gotten tons of Sanyo "Heaters" as they are often referred as. They get this nickname since they tend to run hot when charging. I am monitoring these cells closely, some say that heating up is a normal process for cells that have sat for a long time, that the cells need to burn off some oxidation? or something, and the next charge is supposedly colder. I will for sure try this, since so many of them fall in the 2000-2200mAh range. Here's a progress pic of some high capacity cells.

image_zqblyl.jpg


The known good cells, from another angle. A quick count netted me ~320 'A' batteries (2000-2700mAh), that will be used for the car. I also started piling up the 'B' batteries (1500-1999mAh) that will be used for the 24V offgrid upgrade in the summer. It ties heavily into the R&D for the EVNX, so I will just contaminate this thread with all the offgrid stuff when the time comes. Sorry :)

image_fsvotz.jpg


Also, if someone wants more regular updates, I have an Instagram account, @dalathegreat , where you can get more background pics from my previous projects https://www.instagram.com/dalathegreat/

Sneakpeak:

image_skwuit.jpg
 
Sanyo'c can be great cells. If they Heat I put them aside for other projects but the non heaters are great.
 
jdeadman said:
Sanyo'c can be great cells. If they Heat I put them aside for other projects but the non heaters are great.
Yeah, I mark them with 'H' if they are hot, these are the ones I will cycle for a while before deciding if they are A grade or B grade. Having fond memories of Sanyo NiMH in the past, I really like Sanyo as a brand. My only dislike with their 18650's is the awful red wrapper, it doesn't feel like quality. Not that it really matters, they will be quite tucked away :)


mike said:
Is Hammerite pretty much the same as POR15?

Not really. POR15 is heavier, harder to apply, but more forgiving when it comes to rust treatment. With Hammerite, you need to really get the area rust free before applying it. Hammerite is cheaper, so I will continue to use it, since this project will require loads of it ::) I will also apply more stuff on top of some areas, stonechip protection etc. Both POR15/Hammerite would work excellently for these kinds of projects though :)
 
Good stuff! See if you can snag an electric power steering pump from a junkyard. I believe Prius' came with them. Just go to some local yards and ask if they've got any electric ones.
 
jdeadman said:
Sanyo'c can be great cells. If they Heat I put them aside for other projects but the non heaters are great.

I like when i get a red one SANYO showing big numbers :) makes me happy.. because lots of them goes back to recycling :(
love the ZT ,ZTA and FM that goes over 2400mAh :D


goeielewe said:
Good stuff! See if you can snag an electric power steering pump from a junkyard. I believe Prius' came with them. Just go to some local yards and ask if they've got any electric ones.

yes they do have that ::) also AC unit may be handy .. this is also electric ... because mine 2011 Prius runs AC when ICE(internal combustion engine) is off. Don't know for sure .. but i think i read somewhere that ac has a heater also ..
 
Sorry about the lack of updates, nothing major to report, just putting stuff together piece by piece.

I took this month as summer vacation, started out with loads of summer cottage tinkering. I have upgraded the electrical system slightly, this is a off grid solution since it is situated on an island.

I added two more solar panels to the rack, for a total of 4x90W=360W

image_ysdpun.jpg


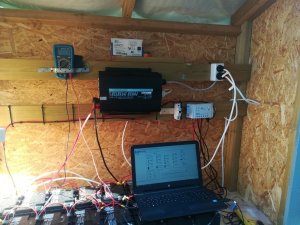
I added a PT100 temperature probe to the LS2024B PWM charge controller, and an USB->rs485 modbus cable, so I can tweak the parameters on the charger. Here's the messy but functional electrical outhouse.

image_zcbarw.jpg


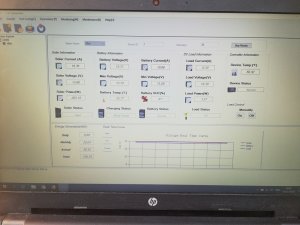
The battery bank consists of 16x28Ah lead acid batteries, for a total of 448Ah. Here's some livedata.

image_uykzzr.jpg


I really want to continue to upgrade this site, maybe even add some lithium storage to the mix. It serves two houses, provides 12V illumination, 230V AC to two fridges via an 1000W inverter. Charges phones,laptops and tablets. Going back to life without electricity on the island would be impossible now :D

Back to scavenging, I picked up 25x laptop batteries from a PC store, here's a snapshot of some average netted capacities

image_xhlpwk.jpg


Unsure about usable cell count, but I am still way off what I need. I think it will last until 2019 to complete the scavenge.

image_dntzoz.jpg


Oh, and I started parting out the SR20VE Nissan, since I need the gearbox from it. More on the gearbox/axle setup later :)

image_ijmtwh.jpg
 
Phew, the weather is crazy hot in Finland right now! I am not used to 30*C :D

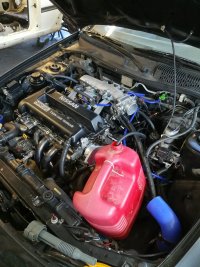
Still, somehow managed to lift out the engine/gearbox from the spare part NX. Had to get creative with the lifting, since I had no motor lift available.

image_wopkgf.jpg


And here is the price! This is an 6-speed RS6 gearbox, exclusive to the Japanese market. I have been using it in the turbocharged NX for a few years, and I'm very pleased with it. It should be able to handle >400whp easily, something that the standard 5-speed does not (often strips gearstacks at >250whp). By further adding shockproof oil into the mix, 450whp and beyond is easily attainable.

image_lbkyoc.jpg


Since the gearbox is intended for a Nissan B15 chassis(2000-2006), and I'm putting this in a B13(1990-1995), hybrid axles are a must. Here is the beefy setup:

image_njcwcd.jpg


image_kinmwo.jpg


Phew, more on mounting this tomorrow. I am going for my fourth shower...
 
Wow what a massive project Dala. Way more than building a powerwall alone. Great updates.
 
So here is how to modify the chassis to accept a more modern shift linkage.

I first removed the original 5speed shift linkage, that consists of two heavy rods, actuated by the shifter. It weighs quite much.
On the bottom we have the new 6speed shift linkage, that works with two wires, actuated by the shifter. It is lightweight, and has many plastic parts.
Funfact, the 6speed linkage comes from a 2007 Nissan Primera, 2.2DCi. This works by sheer luck :)

image_vqolbb.jpg


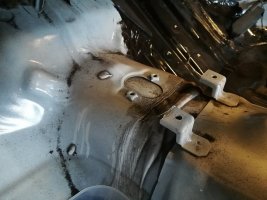
Here's the torpedo tunnel in the car. Nissan decided to place some weird cutout, exactly at the place where I need to mount this. It's as if they actually intended the B13 chassis to have a more modern linkage, maybe in the future revisions?

image_kizded.jpg


So, cut it open, and splashed some paint on it to prevent it from rusting.

image_xanifh.jpg


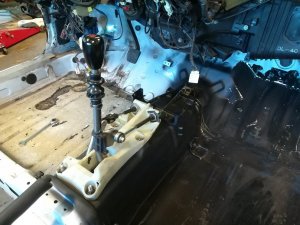
And simply place the shifter on the original spot. 2/4 bolt holes lined up, I modified the last ones to work. SR6 shifter completed!

image_xnpjoc.jpg


I also got the first driver side gearbox mount on. It's a custom piece, fastened with all the bolt holes that lined up. 2x 14mm9grade and 5x 10mm8.8grade. It also has prothane inserts, for extra stiffness. It should be way stronger than the original mount, and capable of much more power :)

image_ivslzg.jpg
 
I gave building a prototype a go. Used some B-grade cells (1750mAh) to make a powerbank.


image_zdnprw.jpg


It works perfectly! Charged my phone overnight with it :) It totals at around 44 000mAh. You wont be seeing this in stores anytime soon though ;)

I used MMJ, housing electrical 1.5mm2 x3, stripped the cabling and twisted the three leads together with a drill. Soldered 'fuse' wire from old resistors, that burned at too high current :( But better than nothing.

Did learn some things.
-I will need to sand the cells before soldering. Some had sticky coating on them, making it hard to solder
-I need more consistent fuse wire. Will order a ton of 1A glass fuses, seems to be the best option.
-My copper bends were quite wasteful, I need to optimize it for the next revisions, and make tighter bends.
 
Managed to paint the whole floor, now atleast the inside wont be rotting anytime soon :)

image_oexgnq.jpg


Found a new store to scavenge at, netted me 5 free packs :)

image_dgosxh.jpg


I took the powerbank into use at the summer cottage, worked beautifully. Kept two phones and a bluetooth speaker going nonstop for two days, could probably go another few days :D

Now I will have to focus on moving, so I won't have any spare time for a few days. But some good things will come, the new apartment will have space for battery testing!
 
Lookin Good
 
Here's the mAh capacity reading for the last batch, just to give you an idea on how many were good/trash from a garbage pile

2130 A
2142 A
2154 A
2172 A
2133 A
2110 A
2127 A
2152 A
2136 A
2111 A
2136 A
2098 A
1702 B
1711 B
1756 B
1715 B
1731 B
1714 B
1346 too low capacity
1314 too low capacity
1326 too low capacity
1208 too low capacity
1021 too low capacity
1013 too low capacity
942 too low capacity
991 too low capacity
820 too low capacity
991 too low capacity
846 too low capacity
922 too low capacity
500 wont charge within 8h

So, 11 good A-grade ones, 6 acceptable B-grade, 12 too low, 6 dead ones. Quite a 50/50 percent chance being good/bad in that batch. Usually it's more 75% good ones, but you'll never know before you test... Are your salvage numbers looking the same? :)
 
It's roughly 2:1 ratio between useless cells and cells with above average capacity that you will use in the end. Useless cells means dead / low capacity / issues / Sanyo cells. Average capacity is between 1900mAh and 2000mAh. Obviously results may vary depending on source, models, luck...

It's all fun and games as long as you get the batteries for free. As soon as someone tries to charge you for them, forget it.
 
I've been having really good luck as of late. The last 2 batches of packs I got were medical packs. The first are Mobius 3s 9p packs that are supposed to be 2600mah and with my testing I'm getting almost 2300 consistently. And the other is a 3s1p packs that are sanyos but not the heater version. And all have been in the 1700-2000range. With only a fraction of dead cells
 
Nice work m8!
 
I have successfully moved into the new apartment, and can now resume scavenging at a higher rate. These past two weeks have been slow, only picking up 3-5 packs per week now. On the plus side all have been free, thanks to amazing colleagues :)


image_jlirxi.jpg


Here's the latest scavenging average from last week.

2679 - A
2659 - A
2659 - A
2658 - A
2622 - A
2621 - A
2604 - A
2602 - A
2599 - A
2595 - A
2409 - A
2363 - A
2328 - A
2383 - A
2313 - A
2300 - A
2294 - A
2276 - A
1375 - Too low, garbage bin
1361 - Too low, garbage bin
1251 - Too low, garbage bin
1212 - Too low, garbage bin
1119 - Too low, garbage bin
976 - Too low, garbage bin
58 Did not charge within 8h
null - Did not charge within 8h

So out of 27 cells, 18 were usable for the car. 67% success rate.

This sure is addictive :)
 
Back
Top