Project 18650

rolfbartels

Member
Joined
Jan 16, 2020
Messages
53
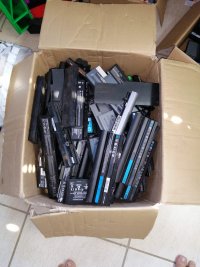
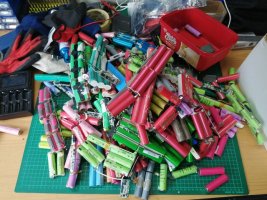
So I have been collecting,stripping, cleaning, charging, storing and testing 18650's till all I see when I close my eyes is 18650's

My plan is to build 2 x 7S80P ( >1800mah per cell )banks and hook them up to my Axpert 3KVA inveter and replace my 6 x 100ahlead acid's.

Here are a few pic's of how things are going

Striping
image_axhcdx.jpg


Cleaning

image_rgjryo.jpg


Charging
This is how I started charging which I soon realized was not going to work as it was going to take too long

image_qfacbn.jpg


I then tried to increase capacity by doing a 12P parallel charge board and my RC charger but this never pushed 12A even though it's 25A charger again taking too long

image_uxnhid.jpg


Finally I used Seidel Philipp's 18650 PCB design and had them produced at JCBPCB for $2 then added the TP4056 for my charging station

image_qctlka.jpg


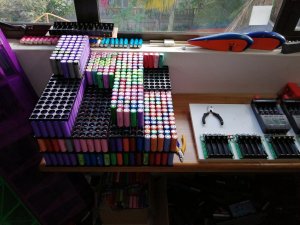
Then into Storage for 3-4 weeks

image_quhkwk.jpg


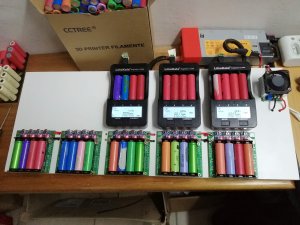
Upgraded my charge station to a Test/Charge station. ( sadly with COVID-19 lock down my last 2 Lii-500's had not arrived in time )
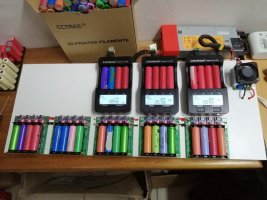
image_erijtt.jpg


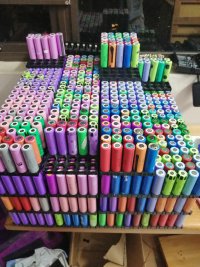
And here are my tested cells L-R ( >2400, >2200, >2000, >1800 )

image_bybtyj.jpg


So I am probably 40% of the way through my testing of the cells, I have around 60 cells < 1800mah, and around 200 cells which I have to discard due to rust, SD, dead or tripped CID.

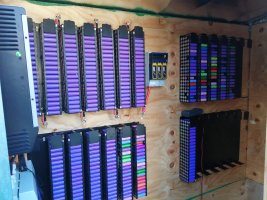
The wall mounting is at the laser cutters which is based off HBPowerwall's design
Next is to make the bus bar jig and start making the bus bars.
BMS is on it's way and this is from the DiyBMSv4 project and has been produced by JCBPCB
I still want to build a new outside shed purely to be more safe

I'll post more photo's as and when I get trough the outstanding stuff, getting old laptop batteries in South Africa is a challenge we don't have good laws around recycling and so people tend to do what the packages saysnot to and discard them in the dump, we also don't have a huge ev bike presents, So I take what I can get and make do, it's been slow but steady.
 
Nice job!!

I am trying out some cells as well and I would like to hear from you what is the method and procedure you are using for testing them. After stripping and cleaning, you just put it to charge and after test it on Lii-500?? Or do you simply put them right after cleaning on Lii-500 to see the capacity?? Which configurations are you using, Fast test with 500mA our Normal test and so on??

I will wait to hear more from you!! Nice job by the way!
 
thamer.khatib said:
Nice job!!

I am trying out some cells as well and I would like to hear from you what is the method and procedure you are using for testing them. After stripping and cleaning, you just put it to charge and after test it on Lii-500?? Or do you simply put them right after cleaning on Lii-500 to see the capacity?? Which configurations are you using, Fast test with 500mA our Normal test and so on??

I will wait to hear more from you!! Nice job by the way!

After cleaning them I test with a voltmeter for any dead cells, anything that has a volt reading I charge them to 4.2v using those TP4056 (1A) modules, I also monitor their temperatures during charge and remove any that are hot to touch, I then let them stand for 3-4 weeks. At this point I put them in the LII-500 to normal test @ 1000mah ( which is only 500mah ) if the volt reading when inserting the cell is <4.1v I discards those as they are self discharging, once the test is complete I write the capacity on the cell and store it. Once I have 1200 cells of over 1800mah I'll build my packs
 
Just a small update, till now I have still been testing cells, I have another load of laptop batteries on their way, about 1500 cells, unfortunately due to South Africa being in lock down for the past 3 weeks and 2 weeks to go, only essential services are allowed to deliver and old laptop batteries are not considered essential so I guess I have to wait.

In the meantime I have made my busbar jig and started creating the bars.
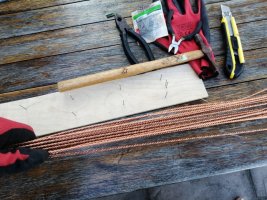
The busbars are 3 x 2.5mm solid copper twisted together using a drill, what surprised me was how much copper wire you actually need to make 28 busbars below is only 14 and I used 10m of 4 core 2.5mm surfix cable.


image_bjqkag.jpg
 
Hello rolfbartels,

please i want to know how you built your power station for charging of your TP4056, if it can produce more amperage if other sub stations are added, et cetera
 
HiOloyeadeniran,

For my testing station I am using a HP 750w 63A 12VServer Power you can see it in the picture below top right has an orange label.
From this I power all the Lii-500 which I use for my discharge testing (3 at the moment, 2 more to come). I can also use the Lii-500's to charge for storage SD testing once I have stripped the battires so this gives me 40 charges, but if you get into a cycle where you are charing and discharging then I can only do 20 of each which is enough for me.

I also power a$6 DC Step Down Module which is capable of delivering 20A @ 5v and is enough to power 20 TP4056 module, I got this from banggood,
I found that the heatsink'sgot really hot and you could not touch themso I added a fan and now they are cool to the touch.
If you wanted to power more that 20 TP4056's you just add more of these modules, they are way cheaper than buying a dedicated 12v/5v PSU.

I know of some people who have bought a good quality PC PSU, and these work well too, you just need to make sure that individual rails can carry the load you are
expecting, I had the server PSU so I just need the $6 module.

For the TP4056 charge boards I just followed Seidel Philipp'sdesign, I had the PCB's printed at JCBPCB which cost only $15 shipped for 10, in my picture I am only using 5, you don't need to use these PCBs I prefer them as it has built in protection per TP4056 for reverse polarity. The newer TP4056 with build in protection are at least $1 more per module so using the PCBs works out cheaper.

I have build every thing on a single piece of plywood, this way when I am done I can just pick up the whole station and store it, if I need to use it again I simply place it down plug it in and I'm ready, Makes it far easier and neater.

I hope this information helps.


image_vntrqj.jpg


DC Stepdown Converter

image_mizplr.jpg
 
Proper job!

rolfbartels said:
For my testing station I am using a HP 750w 63A 12VServer Power you can see it in the picture below top right has an orange label.

I also power a$6 DC Step Down Module which is capable of delivering 20A @ 5v

Just wondering - Does the HP PSU not have a 5v output you could tap straight into?

What are you going to use to connect to each cell - fuse wire, spotweld nickel strip, or some other method?

Could you outline what purpose this project will serve - as a UPS backup, or to power your house day to day with panels etc? Have you calculated your daily requirements?

Will the "2 x 7S80P" be in series or parallel ie. 14S80P or 7S160P. I'm guessing the later to get you 48v?
 
Hey Wayne,
2 banks of 7S80P, my inverter is 24V, Currently I have 6x100ah lead batteries that are dead, I used to get 4-6 hours now I'm only getting 30-45mins, my load is between 400w-750w.

The HP PSU does not have a 5v output that can deliver 20A, which is why I have that little setup down module.

I live in South Africa and we have a real problem with our government power grid, the current government has neglected to maintain our power stations and they are also way past thier life span, for the last 5 years we have had what we call load shedding, this is when the grid gets critically strained and the power company based on a scheduled turns off power on a rotational bases around the country for 2-4hrs a day and 2-3 times a day.

This project is to replace the lead batteries and with the ability to just keep expanding, my eventual goal would be to be off grid, I currently have 4.8kw of grid tied solar, but as you can imagine they are pointless when we are getting load shedding.
 
So I finished testing all my sells camecome up 60 short to make 14s80p


image_vpjges.jpg


So what am I gonna do ?..... get more batteries

image_micqiw.jpg

image_xdmgwn.jpg


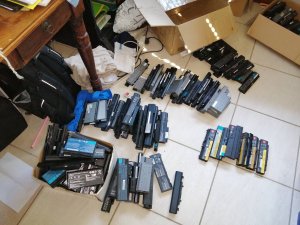
Strip them

image_proptb.jpg


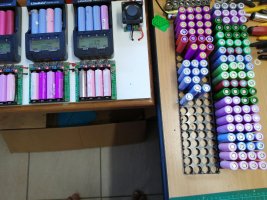
clean and charge them

image_cjeokd.jpg


My Powerwall has slightly stagnated, I and waiting on a tons of orders from Aliexpress but South Africa is still in lock down and out postal service is not processing any parcels
 
Progress is slow, I am still waiting on a ton of packages from China, we are still in lock-down and our Post Service is shut, so in the meantime I have contunued testing my last load of cells and doing further research.
I also took the time to bend my busbars ready from when I can start building my packs.

image_ifwbvg.jpg


I have ordered the steal for my battery shed I should be getting it later this week and I will then start welding up my battery shed, I am hopping to my a vlog and take some snaps while I build it.
 
rolfbartels said:
Progress is slow, I am still waiting on a ton of packages from China, we are still in lock-down and our Post Service is shut, so in the meantime I have contunued testing my last load of cells and doing further research.
Yes sir - a lot of purchases. I just checked my spreadsheet and I'm over 350 purchases since my first purchase of (6 awg wire, 18650 bat holders, OPUS, and 60 UltraFire cells) Oct 2017.Looks like you'll have asubstantial powerwall to be proud of :)
 
Project is progressing slowly, I have collected 95% of the cells I need last batch will arrive next week.

image_jjwlth.jpg


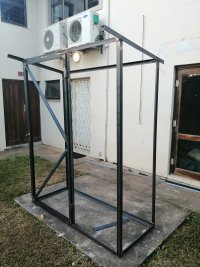
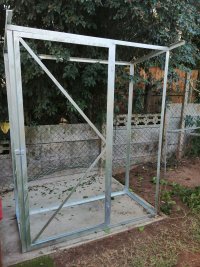
In the meantime I have built my battery shed frame, and it's ready to go to the galvanizes

image_nuckhg.jpg
 
So I have enough cells to create 19 x 80p pack, using repakr I created my cell pack which work out to 180Ah per pack and then started replacing the shrink wrap on the our side cells,
unfortunately I ran out of shrink warp and my order for more has still not arrive. I have another delivery of laptop batteries on it's way to complete the last 2 80p.


image_agsfzh.jpg


baby steps
 
Slow wins the race !!
So the Battery Shed arrived from galvanizes

image_dikfvo.jpg


I started cladding it with a product called cromadek flat sheets, these are 0.5mm sheets which are galvanized and then powder coats, and have a 25yr life guarantee from rust.
on the inside I add insulation to keep the direct sun from heating up the inside.

image_hobwhi.jpg

image_vshznm.jpg


And this is final product, I no just need to hang he 18mm ply board and start mounting

image_qwnhjp.jpg

image_qmlqon.jpg


The shed is very very white, and I am thinking of giving it a light grey coat, I want to keep it as light as possible to avoid it from adsorbing heat.... for now it will stay whit till my powerwall is up and running
 
So I have eventually made some good progress, and am really close to turning on my first bank,


image_vrudmx.jpg


I have installed a NH-00 Fuse Disconnect switch with 80A fusesfor protection andsafety,


image_uojiyo.jpg


I'll be fusing the positive line of each bank through the Fuse Disconnect, these will converge and go to a 125A MCB withshunt trip, which I will control with the DiyBMS v4by Stuart Pitaway,

image_wsqbip.jpg

Asyou can see I am still waiting on some international packages that have been delayed by COVID-19 "(Purple Wraps)5 months and counting now" and I am just finishing off the testing of my last 8 80p packs.


image_jyhfac.jpg


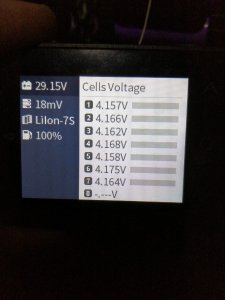
And here is a screen grab of my bank connected to an ISDT BG-8S checker, thesecells havebeen sitting for over 2 months now and with only 18mv difference and almost zero voltage drop I am really happy


image_vhjobp.jpg


Stay tuned I literally have 1 lug to crimp and connect and I can go live......... exciting times !!!
 
Back
Top