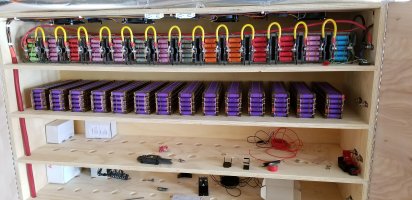
Wolf's PowIRwall

OffGridInTheCity said:
When these are ready... do you have 14 packs and this will take you to 28 packs? Will you be having 2 x 14s batteries or paralleling these new packs in with existing packs.
Its so much fun to get 1,000(s) of cells hooked up ready to charge and discharge!:)
Yes it will take me to 28 packs.
I am more than likely going with 2 X 14s. Besides I already have the longmons.
The new and improved plan is to have 4 X 14s with 1 pack to be a backup spare. Yea I got the bug :D
Right now I'm working out a rotation strategy in my minds eye but I'm not sure how Batrium would fit into this picture.
The plan would be to keep 3 packs live and 1 pack as an emergency spare. Winter storm, snow covered panels power failure etc.
I have found new respect for my 4s3p lead acids though. For one they don't mind being fully charged and can be charged easily at sub 0° C.
They are on a tender and can be easily switched in. Last resort only though.
As winter is approaching I have yet an untested heating system to keep the Li-ion's above 0° C preferably at least 5° C.
We will see.

Yes it is a lot of fun. I am in the process of getting another ~2800 cells to finish the new and improved plan.
Stay tuned though because all plans are subject to change.
As long as 18650's are available who knows what will happen. :cool:


daromer said:
Wolf: Perhaps you said this before but what do you use to check Humidity and temperature and what is used for the PWM to the fans ?

I assume you are talking about the battery box.

I use an ESP32 to collect temp and humidity from a DHT22.
The ESp32 feeds (2) 3.3V relays which in turn feed (1) 5V 2 channel 30A relay to power the fans with 12V and also the (experimental) Heaters.
I know I could have used a level shifter. Next design I promise. :)

Ah the PWM on the fans. Yea that was a lot of fun. Actuall the PWM by itself with a DS18B20 as the temp source and a quick map of temp to PWM was easy.
Also getting Fan RPM by itself from the fans hall switches wasn't that bad either. Now getting both of them running together on an ESP32 that was a challenge.
Giving 3 fans a PWM signal from 1 ESP32 wasn't that hard either but I couldn't figure out how to get RPM from 3 fans on 1 ESP32.
So each fan has its own ESP32 with a DS18B20 to control the speed. Sounds kind of neat as they sync with each other.
I will more than happily share the sketch with you if you want it. It took me a good month to figure it out. But then again I am an amateur.

My other 2 fan sets are Shed Intake Air and Shed Exhaust Air.

Those where initially controlled by AW1209 Temperature Control Switches which as a matter of fact just recently failed.
They tied to a DC 12V 3Bit PWM 4-Wire Fan Temperature Controller. Those still work fine.
So I just recently changed the 2 AW1209s to an ESP32 with 3 DS18B20.
Shed temp, intake air temp right and left. It controls 6 server case fans. I was not going with RPM sensors maybe later. :p

As you can see I am a fan of ESP32 I got all kinds of them in stock (fans too). If I can write the code to sense it and control it I'm on it.

Wolf

image_zatsdz.jpg
 
Last edited:
Smallupdate.

9 packs spot welded 5 to go.

I do love the Kweld.

image_hgrniq.jpgimage_gcburh.jpg


Wolf
 
Nice!

I like the esp32 but rarely use it. Its way to expensive ;) ESP8266 is cheaper and even cheaper is the ESP12 if you dont need many pins :D
DHT22 is used alot here as well.
 
Great Progress
 
Small update all 14 packs have been capacity tested and the results are very good.

All packs were regen charged to 4.2V and discharged to 3.0V at 30A with an iCharger X8.
Now they are ready for the Lexan sides and put into production.


image_wcebzb.jpg

Results of test

image_mmhahx.jpg


On another note got my hands onto a Victron Smart Solar 150/60 and started to play with the Venus OS on a RasPi.
Once I built the interface cable and plugged it in the Venus software recognized it.

image_ersndc.jpg


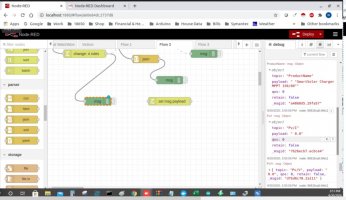
Turned on MQTT and now working with node red to bring the data to my influx DB and then build a grafana dashboard to show and record live metrics.

image_sxyjlo.jpg

Stay tuned on that as I have a rudimentary flow working....... :D

Wolf
 
Last edited:
Are these cells from the LG M26 ninebot batteries?
Very good results. so basically the cells are tested as good as new. This is encouraging as I have a few (2300-2500 M26 cells)
later floyd.
 
floydR said:
Are these cells from the LG M26 ninebot batteries?
Very good results. so basically the cells are tested as good as new. This is encouraging as I have a few (2300-2500 M26 cells)
later floyd.
@floydR,

Yes they are and I am very happy with the results which precipitated the purchase of 2800 more.
Volume discount you know :D
Wolf
 
Small update:

As the fall temperatures forewarn us that the cooler part if not downright frosty season is marching with certainty in our direction, the time has come to build "Battery Box design #2".

Clarification: My battery box is in a unheated shed next to my house and we can have temperatures down to-30° C or -20° F.

Since I now have enough batteries in stock to build (2) more 14s80p batteries I have (2) already 1 in production, the other one waiting for its Lexan clothing and 2 more in the planning stages.
I needed to come up with a creative idea on how to house them and keep them warm enough to charge over the winter.
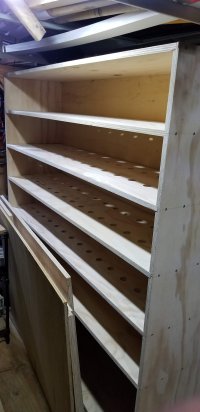
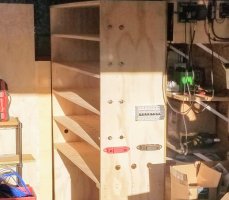
The box has been built with 4 batteries in mind 3/4 plywood and very sturdy. I will share with you the progress of the build.

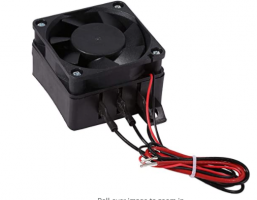
The holes in the shelves( designed to be directly under the middle of each pack) are for heat from 2 incubator heaters which I hope will be enough to heat the stack to at least 5°C during the coldest times. It will be insulated with Reflectix in an attempt to keep the thermal energy captured as best as possible.

That's it for now.

Wolf

image_ewbrbq.jpg
 
Last edited:
To deal with cold, you might want to close shut the front, perhaps with clear acrylic plate.
And heat rises to the top, so a small fan to mix the cold air in the bottom shelf with the warm air in the top shelf will help. Should significantly reduce energy wasted on heating.

If you're planning to heat the whole shed, a small low power circulator fan placed on the floor facing straight up will help reduce energy cost.
Then you might get a uniform 5C room temperature, instead of 0C floor and 15C ceiling.
 
ajw22 said:
To deal with cold, you might want to close shut the front, perhaps with clear acrylic plate.
And heat rises to the top, so a small fan to mix the cold air in the bottom shelf with the warm air in the top shelf will help. Should significantly reduce energy wasted on heating.

If you're planning to heat the whole shed, a small low power circulator fan placed on the floor facing straight up will help reduce energy cost.
Then you might get a uniform 5C room temperature, instead of 0C floor and 15C ceiling.

Ah yes ajw22 I will close the front no worries and thank you. I should have mentioned that I indeed will put doors of some kind on it.
Also the incubator heaters have fans already on them and will be placed to send the warmer air upwards through the holes. The 5th shelf which you don't see in the previous picture will house all the electronics to manage this box. Servo control for the vents to open and close according to box temperature. ESP32 for exhaust fans PWM and temp control, SSR's for controlling the higher amperage fans and heaters. Parameters of the environmental controls all sent to my influx database.All is powered by my supplemental 12V system with its own array on the shed. I have 2 massive 12V AGM batteries in series with 560Ah capacity for the supplemental heating and cooling. I won't have to worry about those batteries in the cold.

image_irfwab.jpg

image_sfpkza.jpg


The 5th shelf.

image_bwuvco.jpg

Heating the shed is really not on option as it is rather shall we say drafty 😇

Wolf
 
Last edited:
Small update:

After 149 days of continuous charge and discharge cycles of the "Wolfenstein" IRpack it is working very well.
At max discharge of ≈3.45V the max difference between cells is ≈0.06V and today was a great charging day, an almost perfect fall solar day in the northeast.
The LUX curve was perfect. The auxiliary 12 Volt battery definitely got a ballance charge today. ;)

image_akteez.jpg


When approaching full charge at 4.05V the cells voltages all tighten up and all come to within 0.02V of each other.
There has been no degradation of the pack so far ≈140Ah consistently across the board.
Very little interaction of the batrium balancing system so far.
Can't wait to get my 2nd pack installed.
.
image_fulfmd.jpg


Wolf
 
Last edited:
Update............
I recently managed to acquire a Victron Smart Solar MPPT | -Tr Controller for reasonable money. I have 2 arrays with orientation easterly and westerly.
Doing a bit of research and with my panel orientation and placement,combining the 2 arrays was definitely an option without a significant loss of production.
But before I dismantled all my carefully installed sensors and parameter sensing equipment wanted to make sure I could get the data from the Victron to my influxdb and grafana. Spending a bunch of time and research into this was very fruitful and I now am successfully importing all the data I want into influx and grafana
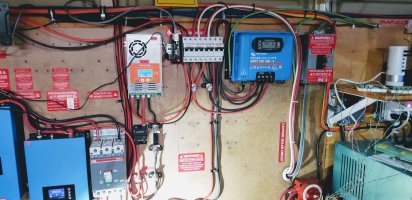
It involved setting up a Rpi with the Victron "Venus" OS, Docker on an Ubuntu Linux machine and the docker compose file from Victron. This in it's native form will work just fine as the compose file has the venus server, venus upnp, influx and grafana images all in a nice and tidy package.Unfortunately I am never satisfied with the status quo and the data formatting was not to my liking. So then it was off to node-red a MQTT listener and formatting all the data to my liking. Stripping all the superfluous data that was coming over the dbus I got it down to the important measurements. Once I knew I could get the data I wanted, installation of the charge controller commenced and at that time upgrading the breakers to ABB S200 series was also in the mix.
Dismantling a fully function solar installation and doing a switchover is a daunting task so you do it at night hoping to be up and running the next day. Especially when the forecast says nice weather ahead. I am such a solar snob now and want to draw the least amount of utility grid power as possible.
I am happy to report the switchover was successful and all data processing is working.
Wire management will be the next project.
The other MakeSkyBlue controller is for my supplementary 12V shed power.

image_kjczdd.jpgimage_lhhdcj.jpg


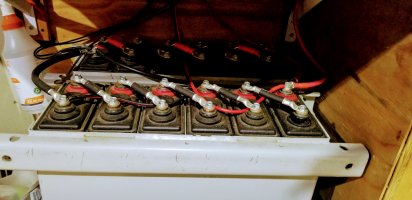
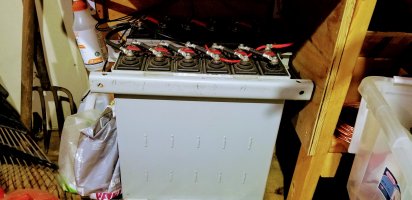
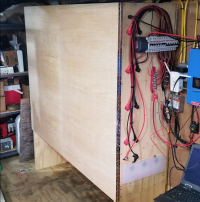
The addiction bug of having more storage capacity has also bitten me and progress on the ≈40kW Storage box is well under way. Vent holes drilled and getting ready for electrical.

image_lhbljd.jpg


Mockup of some possible component placement after the feed through terminals were installed. Still missing the very bottom ones but they are in the mail.
Wolf

image_ccguhp.jpg
 
Last edited:
hey wolf nice to see that the IR way works very well :heart: mine is also IR balanced/sorted but i have very small packs 60P my diff is 0.005/0.004 :Dand working very well for 3.5 months
 
barry said:
hey wolf nice to see that the IR way works very well ❤️ mine is also IR balanced/sorted but i have very small packs 60P my diff is 0.005/0.004 :Dand working very well for 3.5 months

Thanks barry!
It only makes sense to try to get all cells within a small window of IR, mAh, and match as best as possible. As the first pack was my Wolfenstein pack with 4 different manufacturers and ~25 different part numbers I was pleasantly surprised at the outcome. Considering I had to go through ~10,000 cells (many never made it to the charger as the IR was over the limit) to get 1120 good enough to qualify for my Wolfenstein pack I started to look at other ways to prequalify my purchasing choices. Looking at the $ spent on the used laptop and medical packs I came to the conclusion to purchase large lots (1400 cells) of the same packs. I found that to be more cost effective than laptop cells and the added benefit of having the same cells to build my packs with. 99% of these cells test good.The IR and mAhsarevery closely matchedfrom the get go. I have pack 2 ready to go as soon as the battery box is finished and have purchased enough cells for 2 more packs. I expect to be running these packs 5+ years as I will be cycling them below the thresholds to attempt a stress free life for theses cells.

Wolf
 
Last edited:
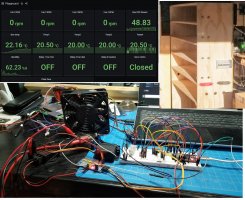
I have 4 different cels LG,Panasonic,Samsung 97%other 3% aresanyo cells but all from the same e-bike packs and it works very well all my cels are
25 mOhm ish and 90% sohso my pack are very healthy and lot of life left :D
My use is from 4.1 to 3.6
 
Quick Update:

As the days are getting shorter and the nights are getting colder and longer ,progress is reasonable and continuous on the battery box.

I now have finished and debugging the code for the single ESP32 (I previously had 4) written for the battery box environmental controls. Surprisingly it works :cool:
The ESP32 will be the control unit for the vent flaps fans and heaters. Bling is fan pwm by temperature and rpm being sampled.
All data of course going to influx and visualized on grafana.

Functional prototype and initial box dry fit of electrical connections.

image_dstnel.jpg


Updated electrical and fan placement.

image_vxzfve.jpg


More to come soon.

Wolf
 
Last edited:
Well it's been a while since my last update so here it goes.
Where to start?
One thing I have done after a summer of learning what my array is capable of, I decide to increase its output. I have 12 X 250W panels split into a easterly and westerly array. I came upon the good fortune of getting a 150/60-tr Victron charge controller and replaced my 2 Make Sky Blue controllers with it. I combined the easterly array with the westernly array and said let's see what happens. It was probably not a good time of the year to do that as I live in the northern hemisphere at a 45° lat so output was ok but not what I expected. Decision time. More panels. Ordered 11 250W panels from an ebay supplier of used panels( https://www.ebay.com/usr/santansolar ). They came undamaged and looked very good. Ordered more IronRidge Flashfoot2 Kits and mounting rails and up on the roof 6 of them went., The other 5 will go onto the utility shed for various power needs one of which is to replace the harbour freight 16 X 25W panels with some more wattage to do a better job of keeping the shed power supply(12V) topped up and have a couple of spares for various experiments.

Now with a total potential of 4500W on the roof I started to do some math in my head. (Never a good thing for my wallet:confused:) I went on the Victron website and downloaded the https://www.victronenergy.com/upload/software/VE-MPPT-Calc-2_4.xlsx excel sheet and started plugging numbers in. Turns out the Victron 150/60-tr with full sun in the summer would max out. So I went on a whim to the facebook marketplace pumped in Victron and low and behold the twin brother of my Victron 150/60-tr was there brand new for sale at a reasonable price. "SOLD" even got it personally delivered.
Bonus!
A little rewire here and there and now I have 2 controllers again. One on the east and one on the west. I must say splitting the arrays in my case seems to have improved output notwithstanding the additional panels. From a recording and reporting point of view I was already collecting the data from 1 Controller via Node-Red and MQTT so it was just a matter of changing the topic from /288/ to /289/ and copy the flow and the other one reports.
Dismal morning (9:45 AM) today plus a light coating of snow on the panels but here is the Grafana dashboard for that. I hope to show and share some really good readings in the future.
1608648199349.png

Besides working on the Megacell Charger and getting cells tested for my 3rd 14s80p battery
20201221_225306.jpg
I have been doing a bunch of work on the battery box. One of the hurdles was keeping the cells above 0°C preferably 5°C. I initially had 2 100 watt 12V incubator heaters
1608644785642.png
which worked pretty good but as temperatures plummeted I found out I needed more wattage. so I now have a total of 4.
Also the fans on the units (China) were woefully inadequate and cheep so those also got replaced. Doors were installed and I am not finished with insulation yet but it appears that even at -5°C the temperature remains in the 4°C to 6°C range.
1608645265632.png1608645376310.png20201220_114546.jpg
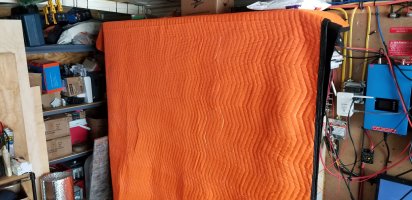
I also cover the box with an Insulating Tarp and a heavy duty moving blanket which helps a lot. There is more insulation as mentioned before planned to decrease the thermal loss of the box. Another thing I have noticed is when I added the 2nd battery the mass of them has stabilized the heating loss. So with eventually 4 batteries in the box it should help the heat cycle by retaining more heat.
20201220_114740.jpg

Of course all parameters being reported to influx and rendered on a Grafana dashboard. 3 more temp sensors need to be installed that's why there is no data on those. Winter got here too quickly and I ran out of time🤨
1608646289041.png
One thing I did notice is that the Batrium temp sensors on the Longmons are quite inaccurate erring to the side of cooler by about 3°C.
Not that that is a bad thing but in a cold environment if you didn't have a secondary more accurate temp sensing system it could mean the difference between charging and not charging.

Once the wiring and all Items are placed into their final destinations I will post the pictures as I am somewhat embarrassed by the "rats nest"
I have right now.🙄
Wolf
 
How are you connecting to the fused nickel? I see solid copper run across. Is that 6awg and just soldered in a few places along the way?
That is correct Nice hot 100W Iron with good kester solder couple of seconds and 5 contact points on each string. Spinning the solid core wire in a drill of course to straighten it out.
Wolf20200831_232954.jpg
 
Great work - love to hear things are going well! I'll be interested to hear about performance of your PV array alignment as time goes on.

>One thing I did notice is that the Batrium temp sensors on the Longmons are quite inaccurate
Interesting. I just got my 14s88p installed in my cargo trailer -> camper trailer conversion and I'm starting to monitor temps of longmons compared to a cheap table top thermometer. Both are near the ceiling (so should measure similarly) and are reasonably close (2 deg) but I notice that some of the 14 longmons are a few deg different than others - and there's no reason for that as they are positioned the same except some are mid-trailer and some are near end-trailer.
1608650994645.png
 
Back
Top