


TheBatteries
Administrator
- Joined
- Oct 8, 2016
- Messages
- 2,127
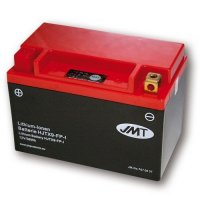
Today's starting battery teardown is an X2Power CYL10030. I can't find much at all about this one online. It looks like it may have been sold by Batteries+Bulbs, so maybe something exclusive to them that's now discontinued? I'm not sure. It's a 36Wh LiFePO4 battery that states it's the equivalent of a 9Ah lead battery. I'm not sure how that math works out though because 36Wh / 12.8V (nominal) = 2.8Ah. That's some interesting advertising there.


I used my new heat gun and was able to op it open with minimal damage to the case. It's still broken beyond the ability to put it back together, but slowly getting better at this...

Here's our first look inside. As with all starter batteries I've worked with, the BMS is balancing only, no on/off protection.

The battery pack is glued in pretty good, it took a lot of picking this black stuff off to remove it. It was harder than silicone, not sure...

10AWG 200C standard silicone wiring. It's nice to see #10 as many that I've opened are using #12.

The BMS has some nice-sized balancing resistors.

The cells are pouches again. I guess this makes sense, given they're lighter and can sustain greater burst currents vs cylindrical cells. They are very soft and bendable, which is usually an indicator that the battery had been abused in some way (charging or discharging way too fast). There is no bloating though, which is interesting.

The cell tabs are soldered together though this small board. Look how close that black wire is to shorting out on the adjoining cell!! The paper on top is burnt too, indicating that it had gotten very hot at some point. All cells were around 0.2V, so pretty much completely dead.


This label is the only identifying information I could find on the cells. The part number B5577123LXP didn't return any results in Google and I assume the other number is a serial number.


I used my new heat gun and was able to op it open with minimal damage to the case. It's still broken beyond the ability to put it back together, but slowly getting better at this...
Here's our first look inside. As with all starter batteries I've worked with, the BMS is balancing only, no on/off protection.
The battery pack is glued in pretty good, it took a lot of picking this black stuff off to remove it. It was harder than silicone, not sure...
10AWG 200C standard silicone wiring. It's nice to see #10 as many that I've opened are using #12.
The BMS has some nice-sized balancing resistors.
The cells are pouches again. I guess this makes sense, given they're lighter and can sustain greater burst currents vs cylindrical cells. They are very soft and bendable, which is usually an indicator that the battery had been abused in some way (charging or discharging way too fast). There is no bloating though, which is interesting.
The cell tabs are soldered together though this small board. Look how close that black wire is to shorting out on the adjoining cell!! The paper on top is burnt too, indicating that it had gotten very hot at some point. All cells were around 0.2V, so pretty much completely dead.
This label is the only identifying information I could find on the cells. The part number B5577123LXP didn't return any results in Google and I assume the other number is a serial number.
Last edited: