Hello from Belgium, so I started my journey on this forum quite some time ago and have been reading a lot of threads carefully.
I have a grid connected system installed with 11 kVA solar panels, spread over 2 inverters.
One power-one 5K-OUTD and one goodwe 5K-ET, which has a BYD 14.4 KVA battery system connected to it. Unfortunately the 14.4 KVA doesn't cover the electricity needs when we have several cloudy days in a row. And since we have quite some in Belgium, I decided to start collecting cells and try to offload a part of the system to a secondary solution. On sunny days, I am backfeeding to the grid, so in my initial setup will just be using an apc ups of 3KVA with 48V battery pack. One of my main loads are my raspberry pi systems and synology NAS which are always on. I used to have an always on server, but I managed to transfer everything to a cluster of several raspberry pi's, which already greatly reduced the power requirement.
I started collecting cells when corona started, so I've been testing, disassembling packs, trying to get more cells, we all know the story. I noticed the offer from the fogstar guys, and couldn't resist, so I also bought 600 cells at a very good price.
I've collected lots of powertool cells, some old e-bike and step cells, below is my current status of collected cells:

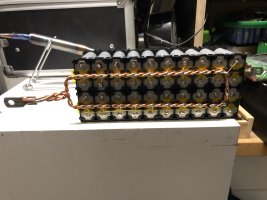
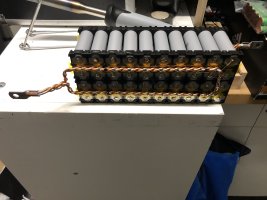
The idea is to build 14S40p packs with these cells. Wolf already suggested not to mix the US18650V3's with the rest, so I'll be using them to replace my Lead Acid batteries in another (smaller) apc ups, but the rest of them are selected to be used in any or all of my upcoming systems. They all pass the full test cycle of charging, resting, low drain, +80% capacity, most of them even are +90% cap.
I'm planning to build 14s40p packs with DALI or jkbms and use cell level glass fuses on each cell.
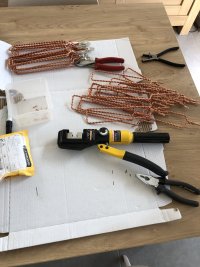
Negative poles will be soldered or spotwelded, just don't know yet how to handle it.
This is my 7 day past usage of the circuit I'll be using to provide the power from the cells:

as you can see, I'm well below 1KVA, and living in Belgium => 240V meaning I would be pulling around 20A from the pack.
At 40 cells per pack, that would bring me down to 0.5A per cell. I'll probably start with the DLG cells, since they are brand new and can take 6A per cell. This should be very mild for them and then I'll be adding a second string as I finish the next packs. Now here's the point were I need more input.
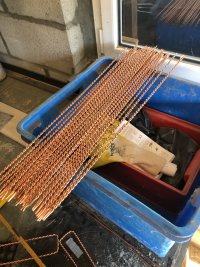
I'll have to figure out the size of the bus bars (need to do some forum digging for that probably). I have 6mm2 copper wire and 4mm2 copper wire that can be used.
Second I have to find out which cells can be combined together and which I should leave aside.
I know I shouldn't mix ICR and INR in the same packs, so I won't even go that road, but I do need 560 cells to create a second and even third pack if I want to store my excessive solar. Last month I backfeeded 130kwh and had to pull 64kwh back from the grid. backfeed produces me 0.04 cents, but pulling it back in at any other time costs 0.26 cents, so you could understand why I want to store more for cloudy days.
That's all for now, I'll be adding more information as I'll be making my next steps in the project and try to figure out how to connect and tune the apc ups to behave the way I want it to behave. I was initially planning to get one of those chinese inverters, but I managed to get this ups much cheaper then the inverter and it basically does what I require it to do (for now)
I can't connect an inverter to my power-one solar panels directly as I'm still receiving 300€ certificates for every 1000kwh I produce. Same for the 5k-ET, can't alter the setup or I loose the certificates (50 € /1000kwh) and this one is a HV system.
I have a grid connected system installed with 11 kVA solar panels, spread over 2 inverters.
One power-one 5K-OUTD and one goodwe 5K-ET, which has a BYD 14.4 KVA battery system connected to it. Unfortunately the 14.4 KVA doesn't cover the electricity needs when we have several cloudy days in a row. And since we have quite some in Belgium, I decided to start collecting cells and try to offload a part of the system to a secondary solution. On sunny days, I am backfeeding to the grid, so in my initial setup will just be using an apc ups of 3KVA with 48V battery pack. One of my main loads are my raspberry pi systems and synology NAS which are always on. I used to have an always on server, but I managed to transfer everything to a cluster of several raspberry pi's, which already greatly reduced the power requirement.
I started collecting cells when corona started, so I've been testing, disassembling packs, trying to get more cells, we all know the story. I noticed the offer from the fogstar guys, and couldn't resist, so I also bought 600 cells at a very good price.
I've collected lots of powertool cells, some old e-bike and step cells, below is my current status of collected cells:

The idea is to build 14S40p packs with these cells. Wolf already suggested not to mix the US18650V3's with the rest, so I'll be using them to replace my Lead Acid batteries in another (smaller) apc ups, but the rest of them are selected to be used in any or all of my upcoming systems. They all pass the full test cycle of charging, resting, low drain, +80% capacity, most of them even are +90% cap.
I'm planning to build 14s40p packs with DALI or jkbms and use cell level glass fuses on each cell.
Negative poles will be soldered or spotwelded, just don't know yet how to handle it.
This is my 7 day past usage of the circuit I'll be using to provide the power from the cells:

as you can see, I'm well below 1KVA, and living in Belgium => 240V meaning I would be pulling around 20A from the pack.
At 40 cells per pack, that would bring me down to 0.5A per cell. I'll probably start with the DLG cells, since they are brand new and can take 6A per cell. This should be very mild for them and then I'll be adding a second string as I finish the next packs. Now here's the point were I need more input.
I'll have to figure out the size of the bus bars (need to do some forum digging for that probably). I have 6mm2 copper wire and 4mm2 copper wire that can be used.
Second I have to find out which cells can be combined together and which I should leave aside.
I know I shouldn't mix ICR and INR in the same packs, so I won't even go that road, but I do need 560 cells to create a second and even third pack if I want to store my excessive solar. Last month I backfeeded 130kwh and had to pull 64kwh back from the grid. backfeed produces me 0.04 cents, but pulling it back in at any other time costs 0.26 cents, so you could understand why I want to store more for cloudy days.
That's all for now, I'll be adding more information as I'll be making my next steps in the project and try to figure out how to connect and tune the apc ups to behave the way I want it to behave. I was initially planning to get one of those chinese inverters, but I managed to get this ups much cheaper then the inverter and it basically does what I require it to do (for now)
I can't connect an inverter to my power-one solar panels directly as I'm still receiving 300€ certificates for every 1000kwh I produce. Same for the 5k-ET, can't alter the setup or I loose the certificates (50 € /1000kwh) and this one is a HV system.


